How to Upload Client Lists to the Philips DPM8000
For busy professionals, a customized client list is a great way to link your dictations to important client or patient demographic information. The Philips DPM8000 allows you to upload and select customized lists then automatically attaches this information to your recorded file. The guide below will walk you through the process of creating and uploading a customized list to the Philips 8000 Pocket Memo. Illustrated images have been included for your convenience.
STEP 1: Create Your List
A client lists should have one title-row and up to 40 content rows with 4 columns each. Every string allows a maximum of 30 characters. The list must be named ‘list.csv’ in order to operate properly.
Note: At this time, please be sure populate all fields as empty fields have caused issues during our lab tests
1. Open Microsoft® Excel to create your custom client list.
2. Start by creating your title row.
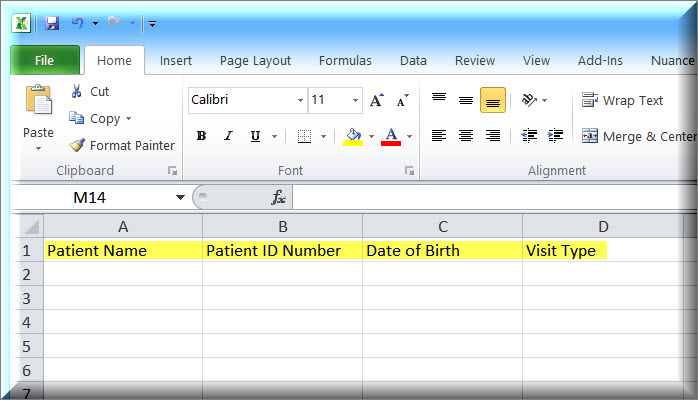
3. Enter up to 40 of content.

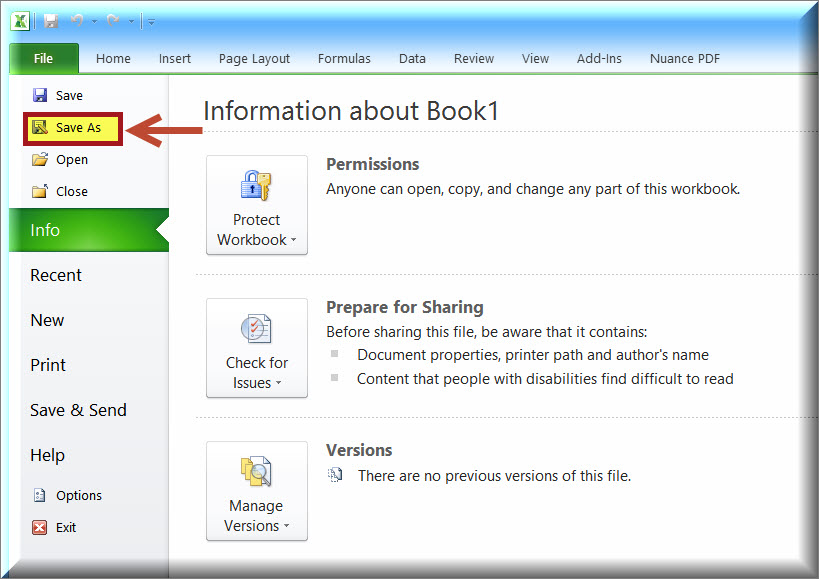
4. Once you’ve finished creating your list, select [File] > [Save As].
5. As illustrated below, Save your list to your Desktop, name it ‘list’ and select CSV (Comma delimited) as the type.
Note: Be sure to save with the proper name as names like mylist.csv or privatelist.csv will be not be recognized or imported properly.
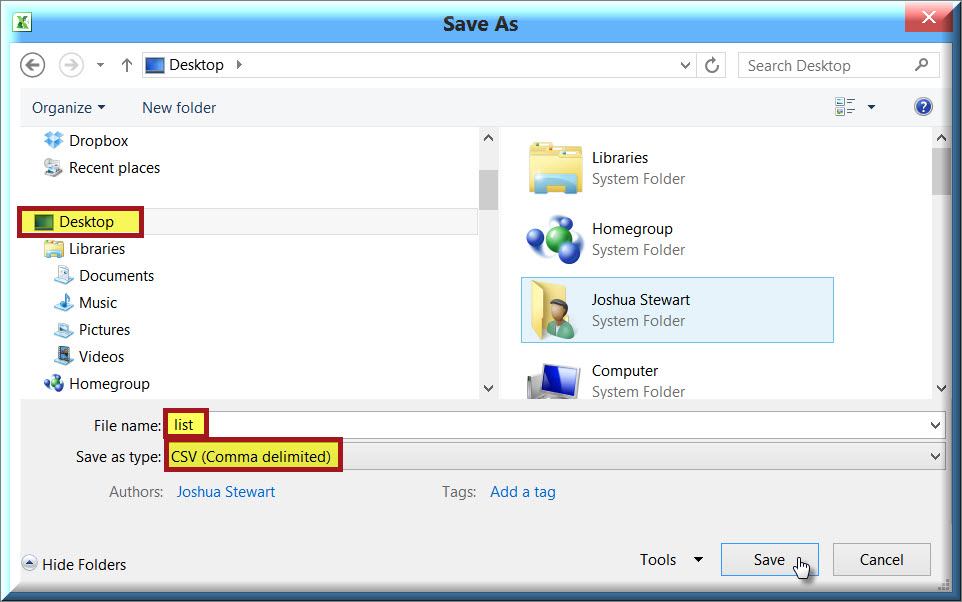
Alternate: You can also save the file as .CSV (MS-DOS)
STEP 2: Transfer the List to the DPM8000
Now that you’ve created your lists, it’s time to upload it to the Philips 8000 Pocket Memo.
1. Connect your DPM8000 to your computer and power it on.
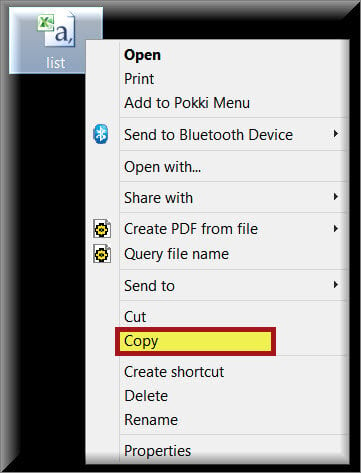
2. Locate the ‘list’ file you just saved to your desktop in the previous step. [Right-click] then select [Copy].
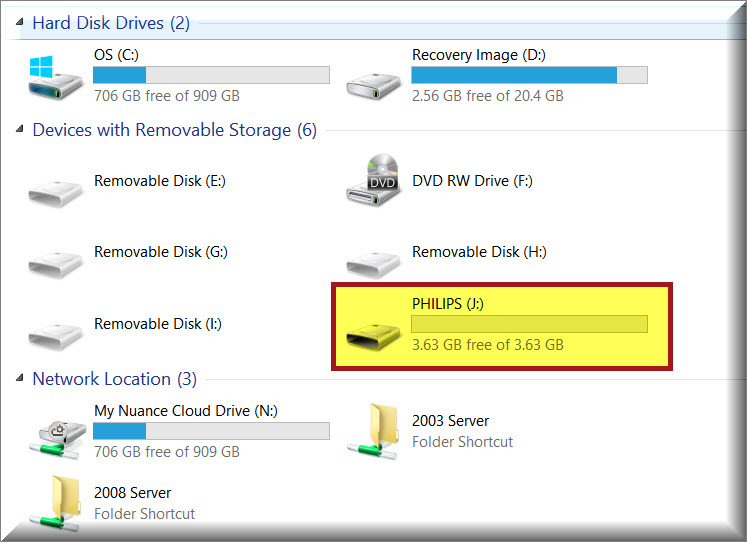
3. On your PC, go to [Start] > [Computer] to open Windows Explorer and locate the Philips device listed under Devices with Removable Storage.
4. Once open, [Paste] the file
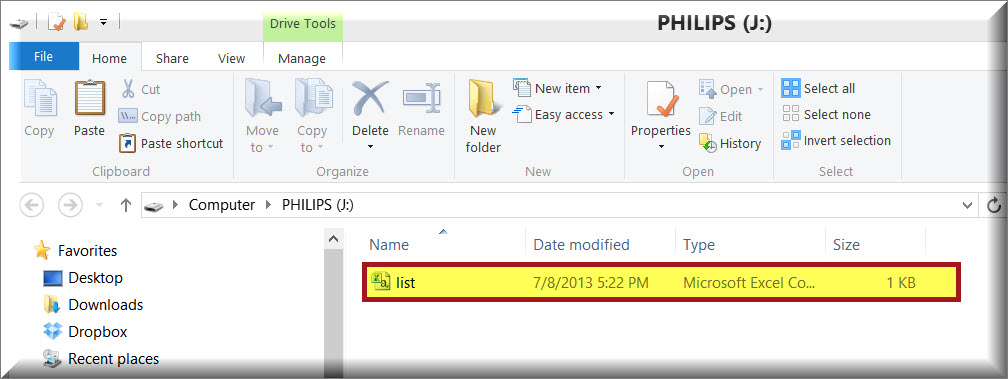
Note: In our example, the DPM8000 is recognized as Philips Drive J:
5. Remove DPM8000 from the Docking station, the device will recognize the list.csv file, validate it and import to the device.
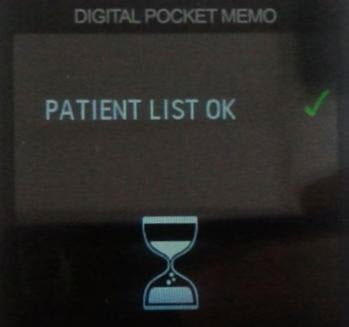
6. On the display, you may see a message that reads PATIENT LIST OK or a simply green check mark.
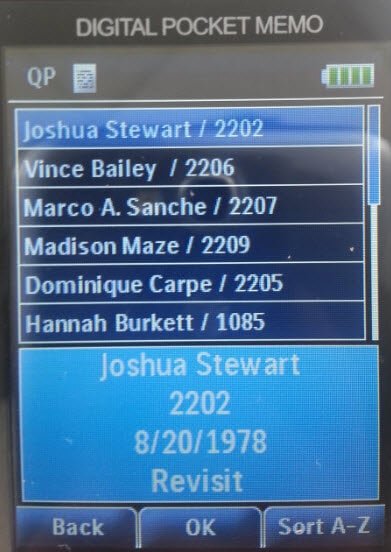
7. Your Device is ready to use with the full content of list.csv file. Click on Function Button 1, now titled, List to open the list, select a value and record your message.
Congratulations, you’re finished!