If you have a digital voice recorder plugged in, your computer may not boot up because it’s trying to boot from the recorder itself. If you run into this issue, follow the directions below to change the Boot Order in your BIOS. By changing the boot order, you can force your computer to boot from a CD/DVD drive, a floppy drive, or even off the network. Changing the boot order on a PC is mostly done in order to boot from a recovery disk or from an OEM disk to run some kind of Windows repair software, such as the Recovery Console.
Here are the steps to change the boot sequence for a PC:
STEP 1: The first thing you have to do is restart your computer and enter the BIOS. You can enter the BIOS when you see a message such as Press FX to enter setup or something similar.
On a Dell machine it’s usually F2, Toshiba is F1 or ESC, HP is F1 or F2, and IBMs usually require you to go to Start, Programs and then Thinkpad CFG to start up in the BIOS.
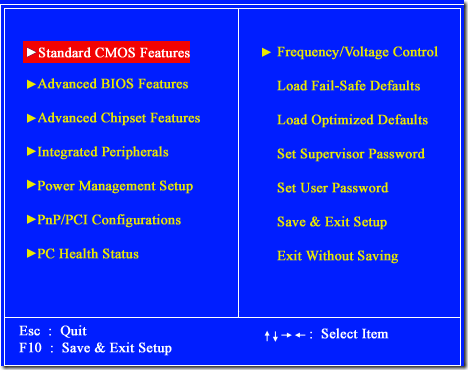
STEP 2: Now that you are in the BIOS, the tough part is finding the boot order section. Note that there are not a ton of options in a BIOS, so just go through every page if you have to until you see something like First Boot Device, Boot Order, Boot Management, Boot Sequence, etc.
It may also be under Advanced BIOS Features or Advanced Boot Options. In the above screenshot, it’s under Advanced BIOS Features. Use the arrow keys to navigate.
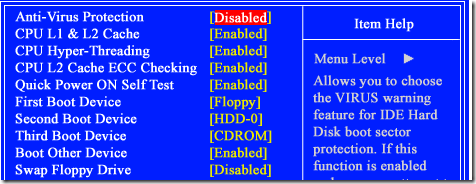
As you can see, there is a First, Second and Third Boot Device. Scroll down and use the arrow keys to change the device to HDD (hard drive), Floppy, CDROM, or Network. You could also have a BIOS that looks like this:

The instructions for changing the boot order are in the sidebar, but usually it requires pressing the + or – buttons to move items up and down in the order list. The first item in the list is what will be scanned first when booting. If boot media is not found, it will try the second device and so on.
Finally, go to Exit and make sure you choose Yes to the Save configuration changes and exit now?
Verification Source: HelpDeskGeek.com & In-house testing
Test Date: 2.14.12