Yes, the Olympus DS2500 Digital Voice Recorder was initial designed to recorder in the DS Pro (.DS2) format, however; many users expressed interest in recording in the Classic DSS format. Olympus responded by producing a special firmware (V1.0.0) that allows users to change the recording format.
This firmware update will allow users to revert back and forth from .DSS to .DS2 as often as they’d like. The firmware is embedded into an easy-to-use installation wizard that will walk you through each step, making updating the firmware very easy for all levels of computer users.
Active eDist partners can access the firmware update from our FTP site, in the Olympus > Firmware directory. If you are not an active eDist partner, email me to request a copy.
INSTRUCTIONS
STEP 1: Changing the Olympus DS-2500 file format to .dss classic
1. Download the Special Firmware to your computer to a location that you can easily find it. I recommend saving it to a folder you create on your desktop.
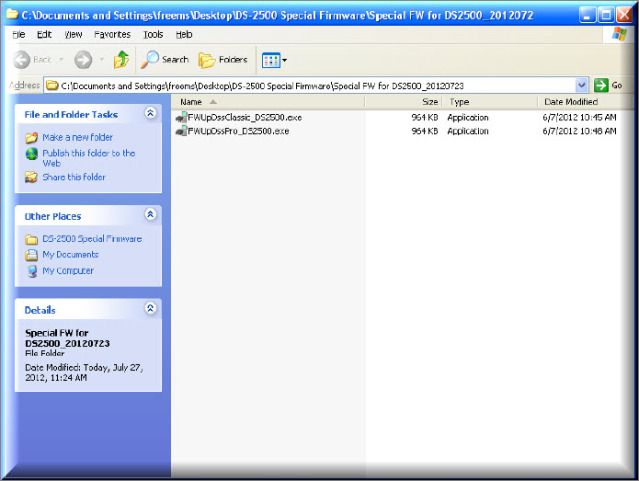
2. Extract the files from the folder before you update the firmware in the DS-2500. Not doing so could cause the firmware not to install correctly. After the extraction process has finished you should see two files (FWUpdateDssClassic_DS2500.exe and FWUpdateDssPro_DS2500.exe).
3. Connect the DS-2500 to the computer (via USB) that has the Special Firmware. If this is the first time the recorder has been connected to the computer, let the computer go through the found new hardware process before installing the special firmware.
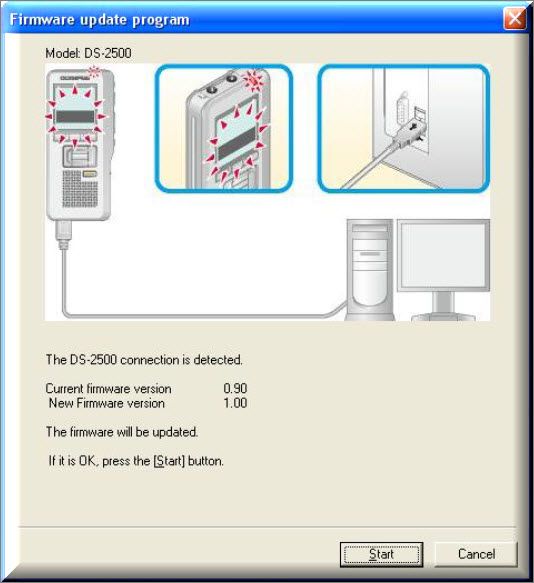
4. Open the folder containing the special firmware and double left click on the [FWUpdateDssClassic_DS2500.exe]. You will be presented with the Firmware Update Program. Click [START] to begin.
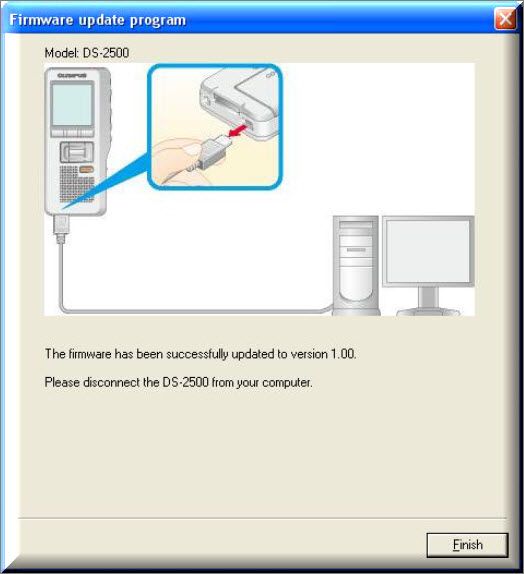
5. When the firmware has been successfully updated, select [FINISH].
STEP 2: Changing the Olympus DS-2500 Classic file format back to the default DS2 format
1. Connect the DS-2500 to the computer (via USB) that has the Special Firmware. If this is the first time the recorder has been connected to the computer, let the computer go through the found new hardware process before installing the special firmware.

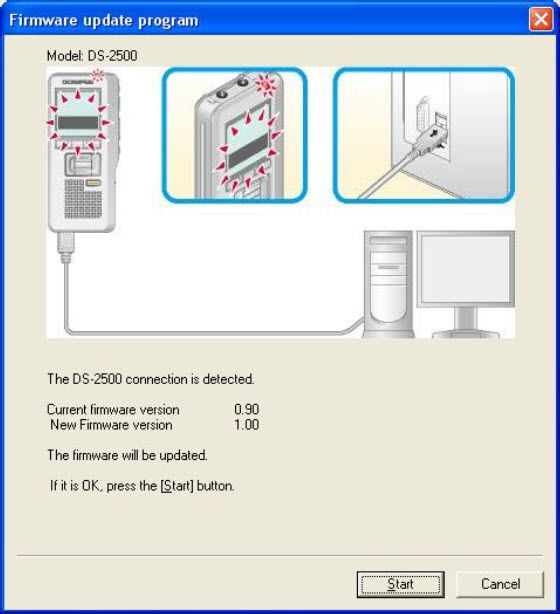
2. Double left click on the [FWUpDssPro_DS2500.exe]. You will be presented with the Firmware Update Program. Click [START] to begin.
3. When the firmware has been successfully updated, select [FINISH].

Verification Source: In-house testing in eDist Lab
Test Date: 8.2.12