The Philips SpeechExec Enterprise solution has an optional Workflow Manager Module that allows you to make advanced workflow configurations quickly and efficiently. The guide below will walk you through configuring the Philips SpeechExec Enterprise software to automatically route Priority dictations to a specific directory visible to all of the typists. The Workflow Manager Module is required for this type of routing. Illustrated screen shots have been included for your convenience.
This guide assumes that you have configured the Philips Enterprise system according to the Best Practices Guide.
STEP 1: Create a Destination Folder
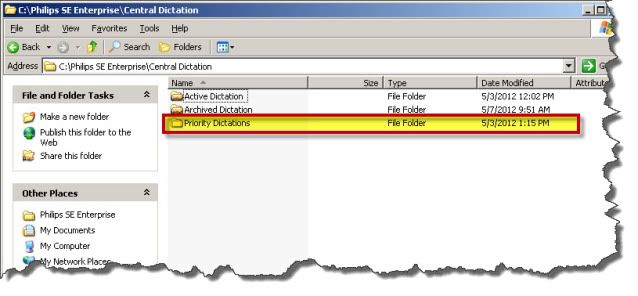
1. We will need to create a separate folder for our Priority Dictations. I recommend creating this folder in the Central Dictation root. For this guide, I have created the folder in C:Philips SE EnterpriseCentral Dictation so that it will inherit the security and permissions of the root folder.
2. Once in the location above, right-click to create a new folder. I recommend naming the folder ‘Priority Dictations‘.
STEP 2: Create a Task within the Workflow Manager Module
1. Open the Philips SpeechExec Enterprise Manager; you’ll be prompted to enter your login credentials. Enter your login credentials to access the Manager then press [Enter].
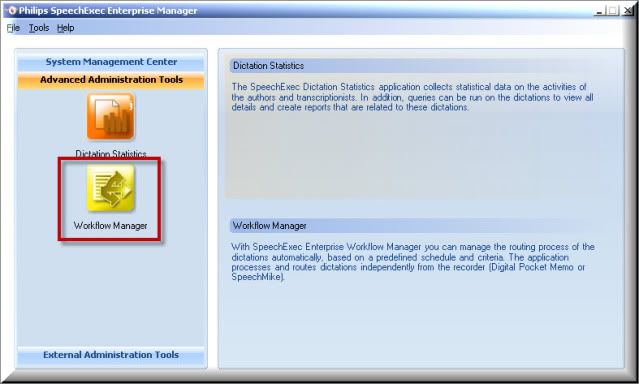
2. Once open, select [Advanced Administration Tools] then [Workflow Manager].
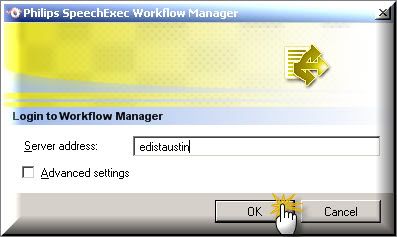
3. Enter your Server Address and click [OK].
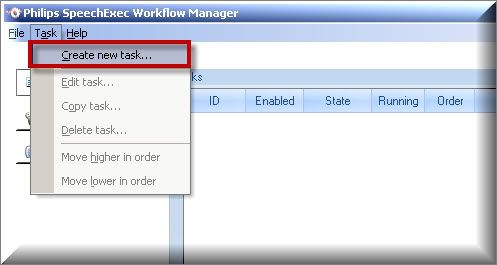
4. The Philips SpeechExec Enterprise Workflow Manager module will open. Select [Task] > [Create New Task].
5. A Task Window will appear. There are several sections to creating a task.
A. Schedule
a. Select [Edit Schedule] to open the Schedule Editor. Select your desired Frequency and Duration then select [OK].
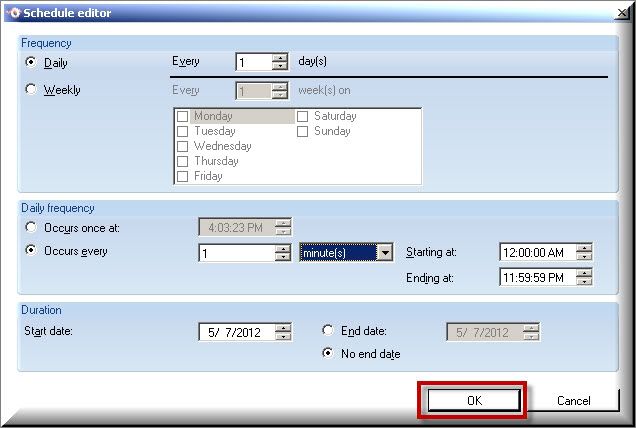
Note: For this guide, I have programmed the task to run every minute.
B. Source Folders
a. Select [Add] to choose the source folders. This will activate the source folder browse feature. Select […] to browse to your Active Dictation folder; once selected, click [OK].
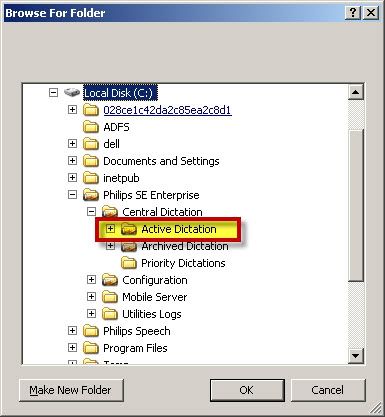
b. Be sure to select [Include Subfolders].
C. Criteria
a. Select [Edit] to open the Criteria Editor then select [New] to set your new criteria. As illustrated below, we want to select the following options. Priority > 8.
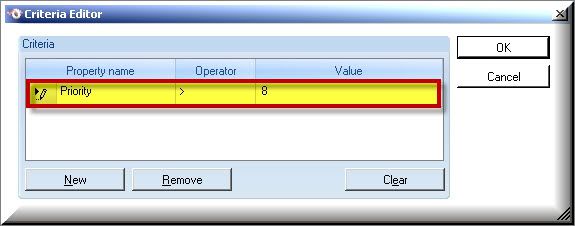
b. Click [OK].
D. Action
a. Open the Action List Box and select [Move Dictations from Source Folder to Destination Folder].
b. You will be prompted to select a destination folder. Select [Define Folder] then browse to the folder we created in step 1. Once the ‘Priority Dictations’ has been select, click [OK].
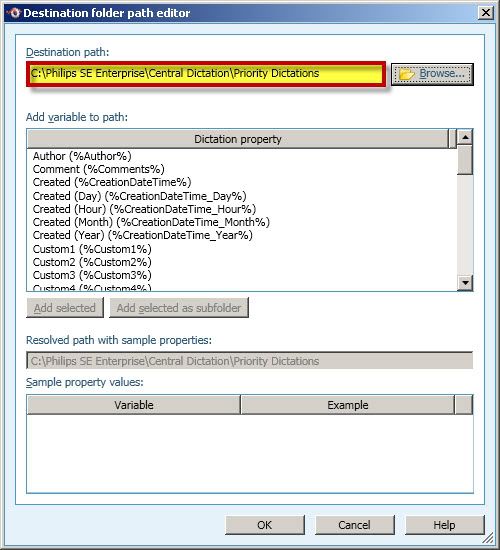
c. Uncheck [Maintain directory hierarchy during copy/move].
E. Miscellaneous Properties
a. In the Comments Field, enter Priority Dictations to easily identify this task in the future.

b. Check [Task enabled (only affects non-running task].
The End Result should look like this

c. You will be returned to the Task Manager, you should now see your task. Select [File] > [Exit].
STEP 3: Enable Folder for Typist
In this step, we will enable the Priority Dictation folder for the typists within the Philips SpeechExec Enterprise Transcribe.
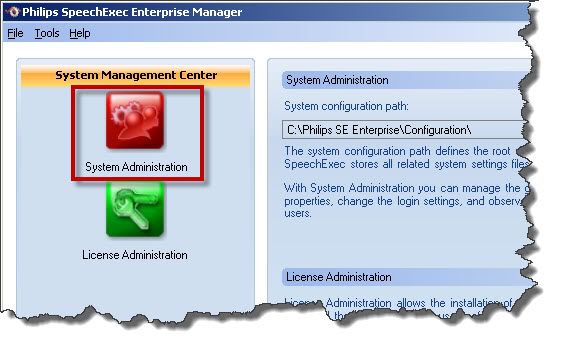
1. In the System Management Center portion of the Enterprise Manager, select [System Administration].
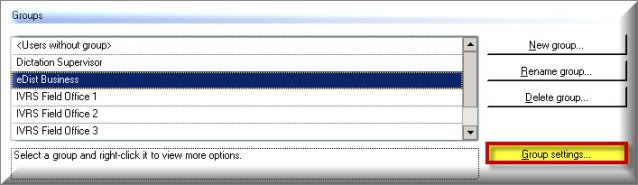
2. Here, we will enable the Priority Dictation folder for the Transcribe application. Select your group then [Group Settings].
3. Select [Transcriptionist] as the Role then select [Next].
4. You will be presented with the transcriptionist settings, select the [Worklist] node then [Folders].

5. Select [New] then [New Pending Dictations Folder].
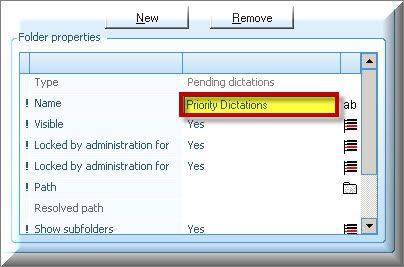
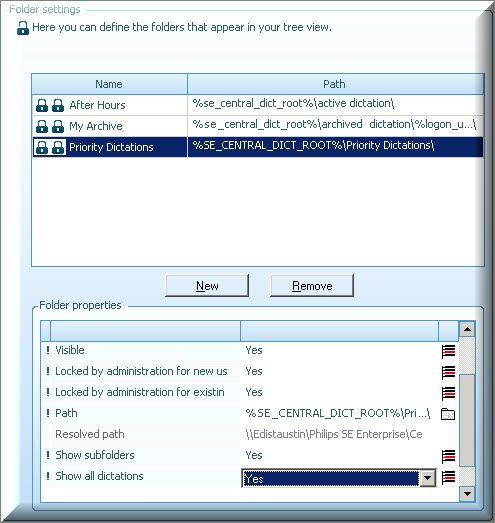
6. Under the Folder Properties, change the folder name to ‘Priority Dictations‘.
7. Set the path by selecting the [Browse] folder to the right of Path. This will open a Path Selection window; place your cursor in the path field then click on [%SE_Central_Dict_Root%].
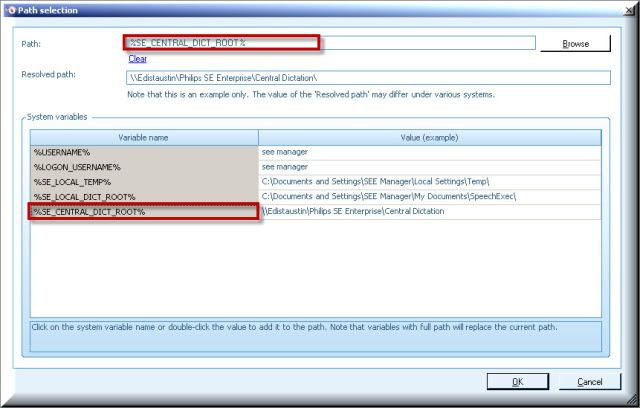
8. The Path field will now be populated with %SE_Central_Dict_Root%, select the [Browse] button to select the Priority Dictations folder created in step 1.
9. Click [OK] then [OK].
10. You will be returned to the Settings window, make sure to select [Yes] for Show All Dictations then click [Next].
11. Click [Finish] then [Close].
12. Exit the Philips SpeechExec Enterprise Manager
STEP 4: Confirm your Settings
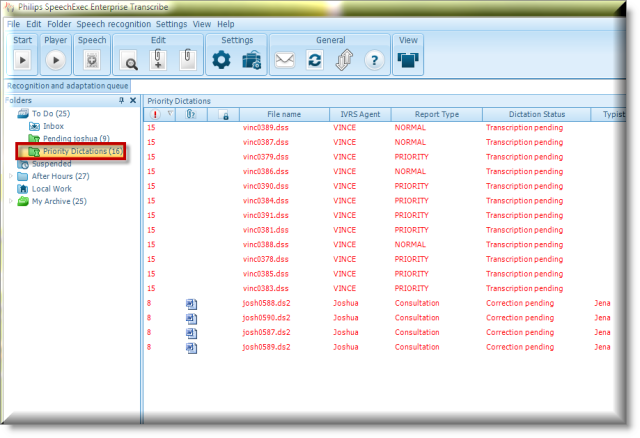
1. On one of your typist workstations, open the SEE Transcribe. You should now see a new folder titled ‘Priority Dictations’. If any jobs were marked as priority, they will now be visible in this folder.
Congratulations, you’re done!
Verification Source: In-house testing
Test Date: 5.7.12