
How to configure an FTP profile within Philips SE Pro Transcribe/Dictate v7
WALKTHROUGH GUIDE #355
This ‘How to’ guide will walk you through the process of how to configure an FTP profile within the Philips SpeechExec Version 7. FTP is better at handling larger files and is usually more secure than email. Illustrated screen shots have been included for your convenience.
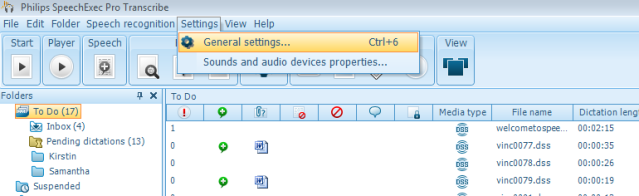
Step 1: Go to the menu heading [Settings] then down to [General Settings]. Or, you can hit the control key and the number 6.
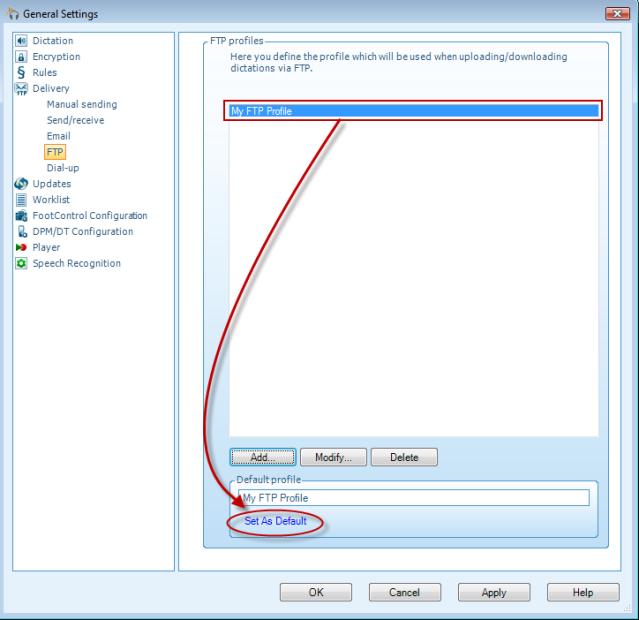
Step 2: In the General Settings panel, look to the left-hand side for the topic [Delivery], then select [FTP]. You want to create a new profile so now look at the bottom of the panel for a button that says [Add]. Click [Add]. Name your profile. The name is your choice. Then click OK.

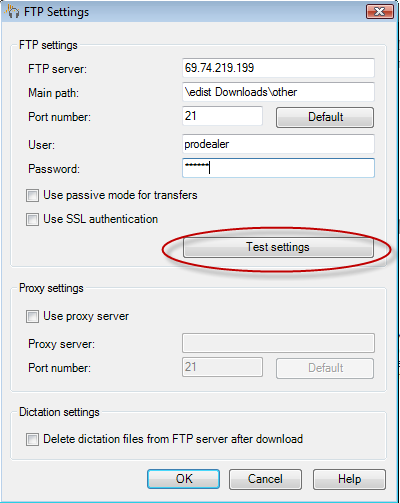
Step 3: The ‘FTP Settings’ panel will appear. For FTP server you can put in the IP or the name of the server. If the files will be sent or received from a specific directory (other than root), put in the path to that directory. Put in the user and password and test for settings. Choose whether you will need SSL authentication or passive mode for transfers. Proxy settings if you pass through a proxy server (rare cases).
Note: Option for deletion from FTP server after download.
Step 4: After clicking OK on the FTP Settings panel, you will be taken back to the original General Settings Panel with FTP selected. You should see your new profile highlighted in blue. Select the ‘Set as Default’ to make this your default mail profile. Now click OK.
Congratulations. You have set up an FTP server to be your default profile to transport your audio files.