
How to configure an FTP profile within SpeechExec Pro v 5.1
WALKTHROUGH GUIDE #205
This set-up guide walks you through the process of how setup an FTP profile within the SpeechExec Pro v5.1 software. Setting up an FTP profile will allow you to define how dictations are uploaded and downloaded for transcription via FTP. FTP is defined as File Transfer Protocol and is a standard Internet protocol for exchanging any type of file between computers on the internet. Illustrated screen shots have been included for your convenience.
STEP 1: Create a new FTP profile
1. Open the SpeechExec Pro software, go to Settings > General Settings> Delivery > FTP. This will direct you to the FTP profile window. Click [Add].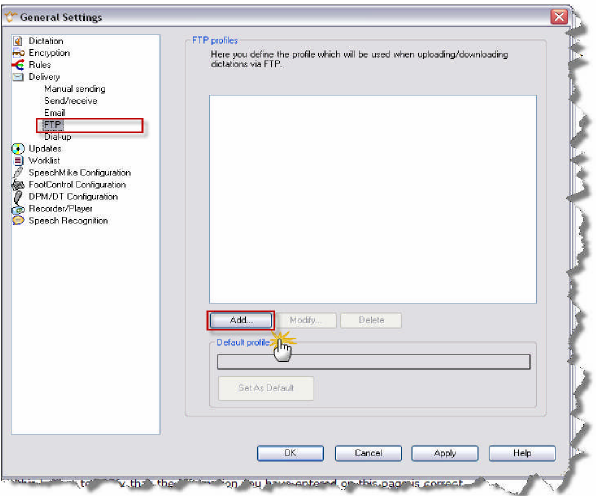
2. You will be prompted to name the profile, enter the name of your choice and click [OK].

STEP 2: Enter the FTP Configuration Settings
1. An FTP Settings dialog window will appear, this is where you will enter your FTP information.
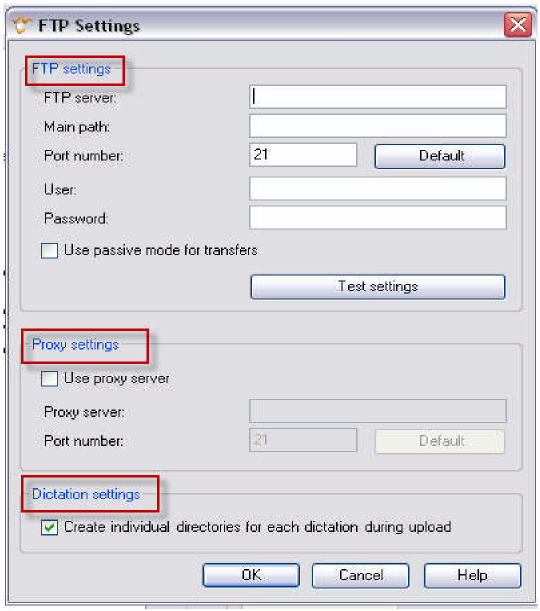
Use proxy server: Activate this option to use a proxy server. A proxy server in necessary if the FTP server is outside the firewall (if one is installed).
Proxy server: Enter the name of the server. This can also be the IP address.
Port number: Enter the port number which identifies the proxy service. Some services or processes have conventionally assigned permanent port numbers. Click the Default button to select this number automatically.
Create individual directories for each dictation during upload: By selecting this option, you can create a separate directory for each dictation on the specified FTP server. This directory contains the dictation and all related files, such as the file for special instructions if available. By default, this option is enabled, but if you disable it, then dictations will be copied to a single directory and hence the older version of a dictation will be overwritten.
2. Click [OK].