How to configure worktypes within Philips SE Pro Transcribe/Dictate v7
WALKTHROUGH GUIDE #369
This ‘How to’ guide will walk you through the process of worktypes within the Philips SpeechExec Version 7. Illustrated screen shots have been included for your convenience.
Step 1: Connect your DPM and open the SE Pro software. Go to [Settings] > [General Settings]. Or just press Control +6.

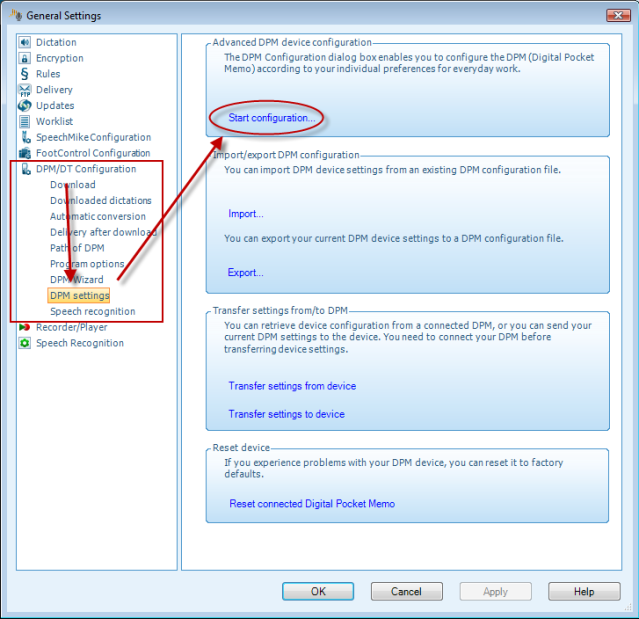
Step2: Once you have opened the General Settings panel, look at the topics on the left hand and choose [DPM/DT Configuration]> [DPM Settings]. Look over to the right of the panel and you will see Start configuration. Choose the DPM you have connected and click OK.
Step 3: This will bring up the DPM configuration panel. Select Keyword Definition. On the left hand side you will see a worksheet with columns and rows. We are focusing on the Worktype column. Notice the rows Displayed Name and Content. Displayed name is the heading you will see on the DPM. Content will be the choices you have to pick from. Now follow these steps and duplicate the picture below.
1. In Worktype column, type in ‘Worktype’. It should be in the ‘Displayed name’ row.
2. Below that all the rows will be content. Type in the types of Worktypes here. In our example, the content is: letter; memo; meeting
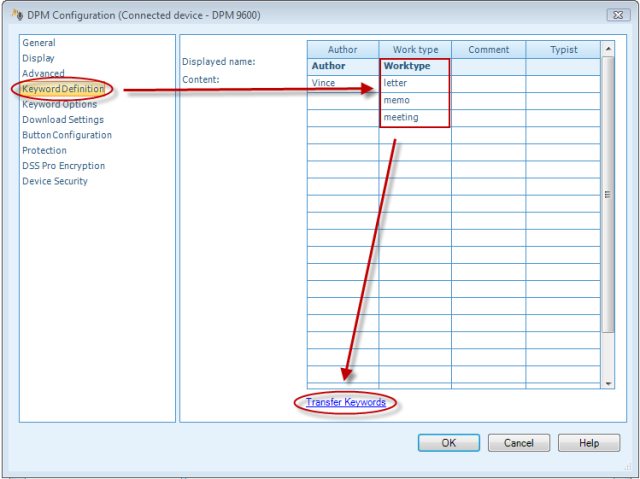
Step 4: Once you are satisfied with the content choices, click ‘Transfer Keywords’, as in the picture above. You will get a confirmation that the Worktypes have been transferred as shown in the example below.